Installation
Download the latest MSI file from:
Releases · rink-turksma/IntunePrepToolUnblock the installer (if necessary):
- Right-click the downloaded
.msifile and select Properties. - If you see an “Unblock” checkbox, check it and click Apply.
- Right-click the downloaded
Install the tool:
- Double-click the
.msifile to begin installation. - Click Yes on any security prompt.
- Double-click the
After installation, IntunePrepTool will be available in the Start Menu.
Running the Tool
Always run the tool as Administrator:
- Right-click the IntunePrepTool shortcut.
- Select Run as administrator.

- If you receive this pop-up message, click Yes.
- Wait a few seconds, then run IntunePrepTool again as Administrator.
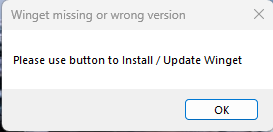
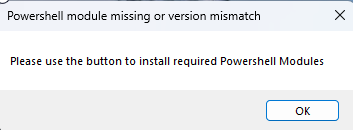
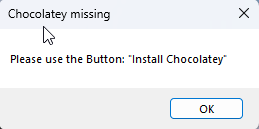
You might see one of the pop-ups shown below. Please click OK. After loading, you’ll have access to the install buttons.
Installing Required Components
If needed, install the prerequisites by clicking the appropriate buttons in the app:
- Install required PowerShell modules (PowerShell_ISE)
- Install / Update Winget (PowerShell_ISE)
- Install Chocolatey (PowerShell_ISE)
- Install Orca (PowerShell_ISE)
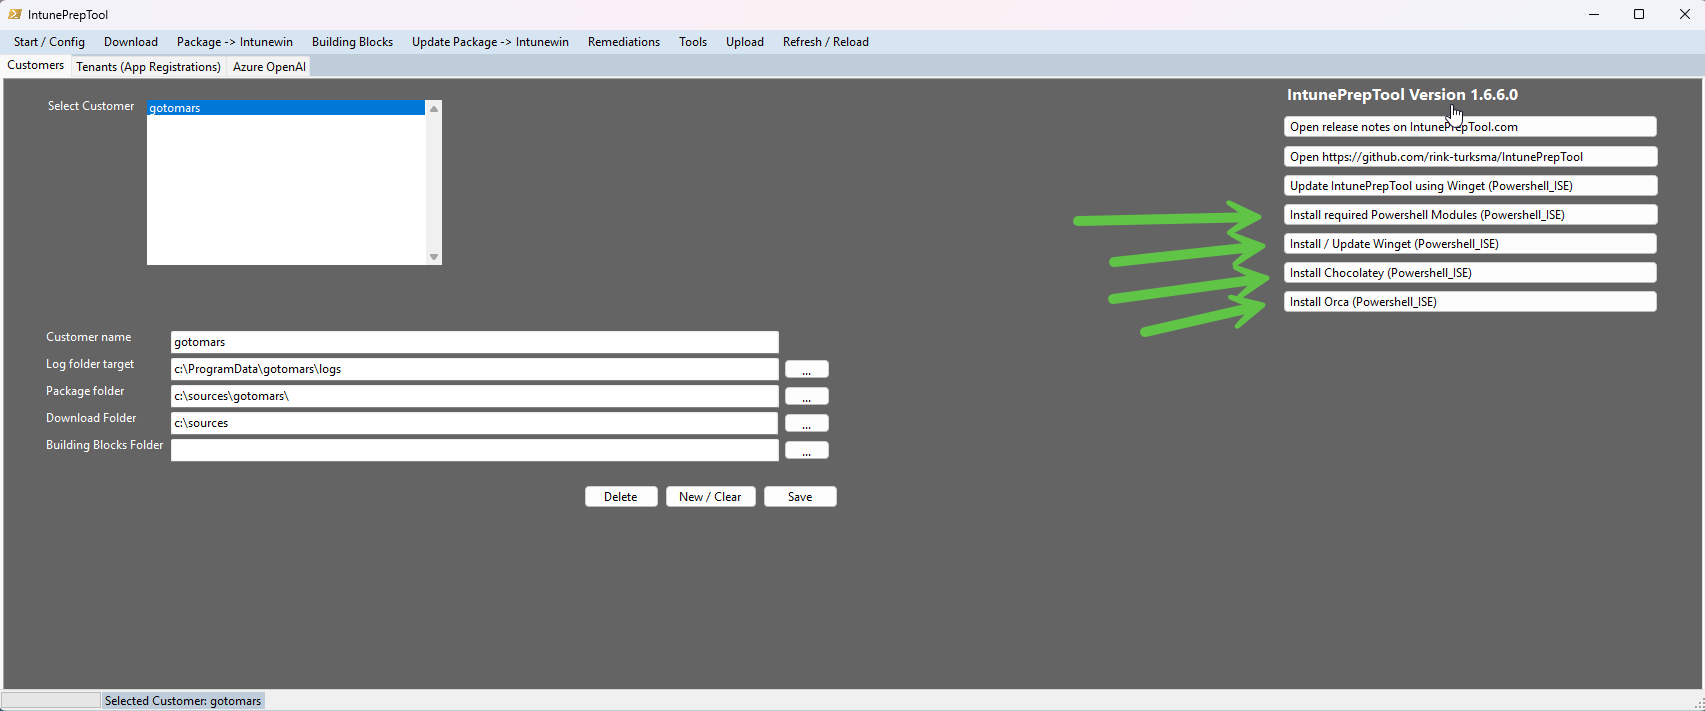
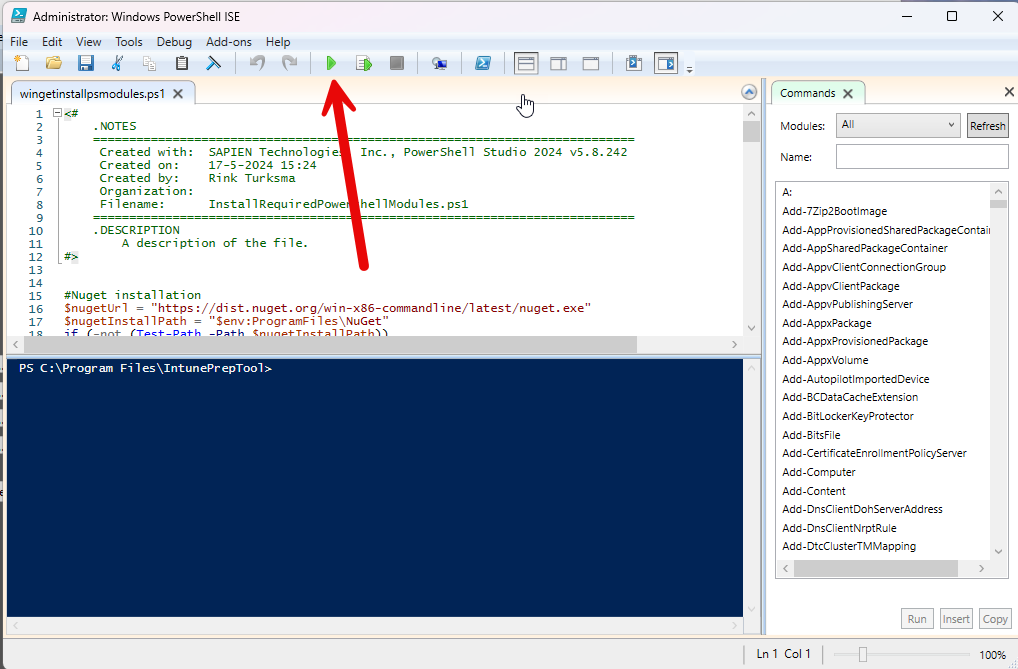
When you click an Install button, PowerShell ISE will open.
- Click Run in PowerShell ISE to start the installation.
- When the installation finishes, reopen IntunePrepTool as Administrator.
This popup sometimes shows up after installing the required Powershell modules. Reopen the IntunePrepTool again in that case. That will fix it. If not and you’re sure all the needed Modules are installed: The content of this “C:\Program Files\IntunePrepTool\InstallReqPSModules.txt” file needs to be ‘true’.
Customer setup
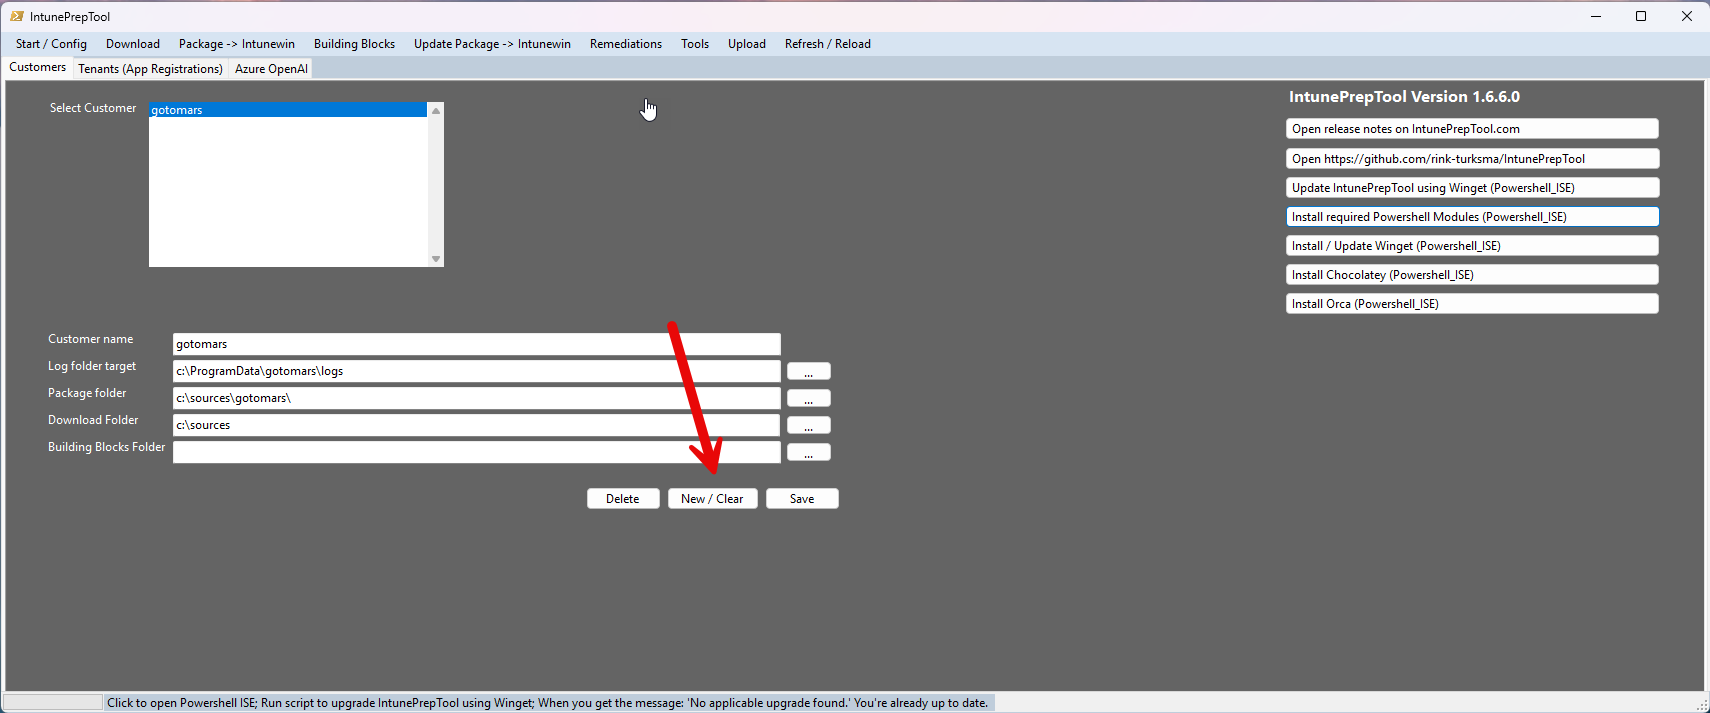 Click New / Clear to create a new Customer profile.
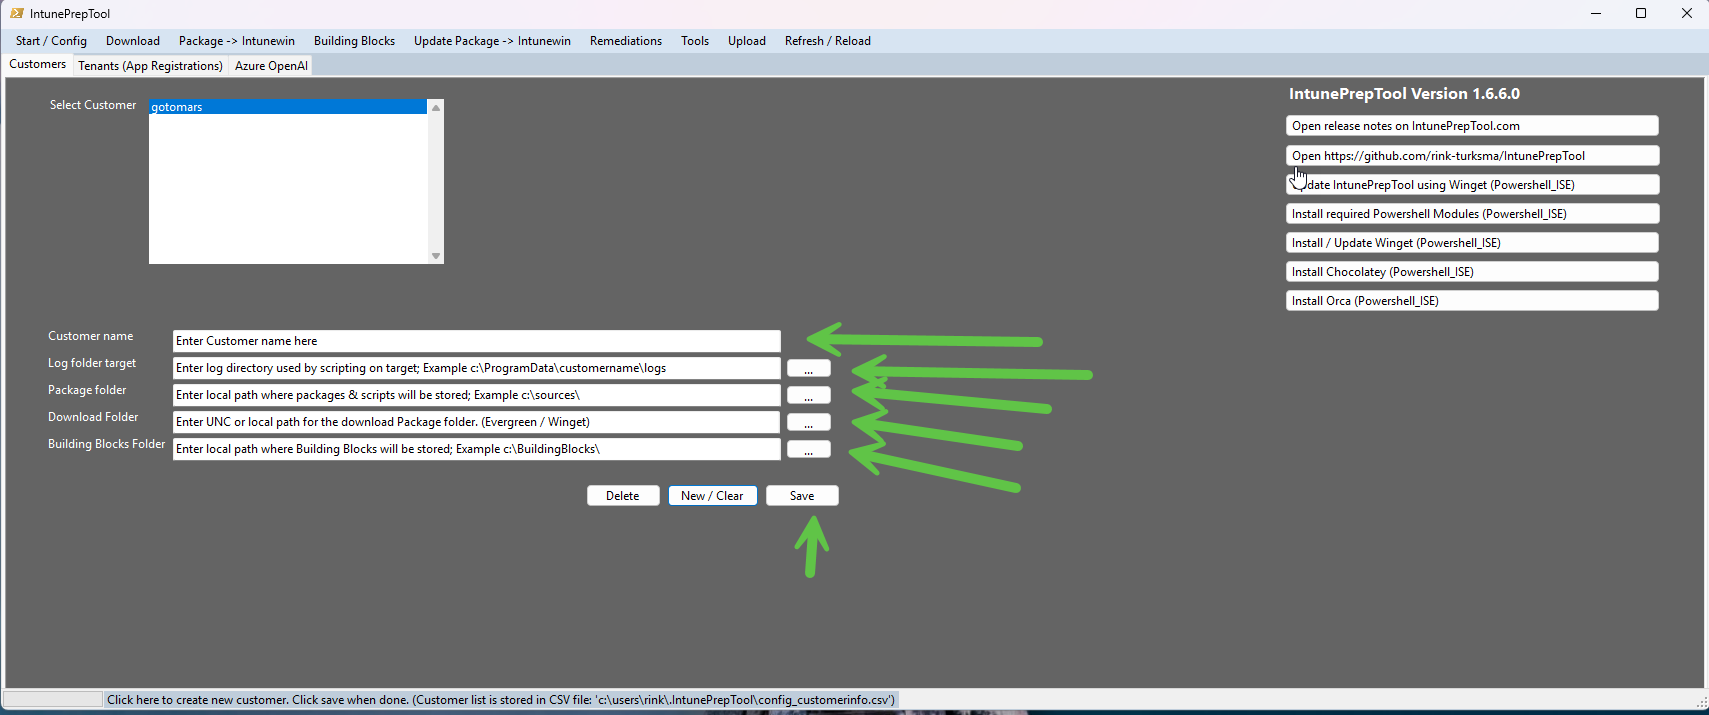
Fill out the form. Please follow these rules:
- No spaces allowed in any of the fields.
- Use a valid path for the Log Folder Target, e.g.,
C:\ProgramData\CustomerName\Logs - Set the following folder paths:
- Package Folder – Local path to save created packages.
- Download Folder – Location for optional Winget downloads.
- Building Blocks Folder – Where Building Blocks and their packages are stored.
- Click Save when done.
Tenant setup (App Registrations)
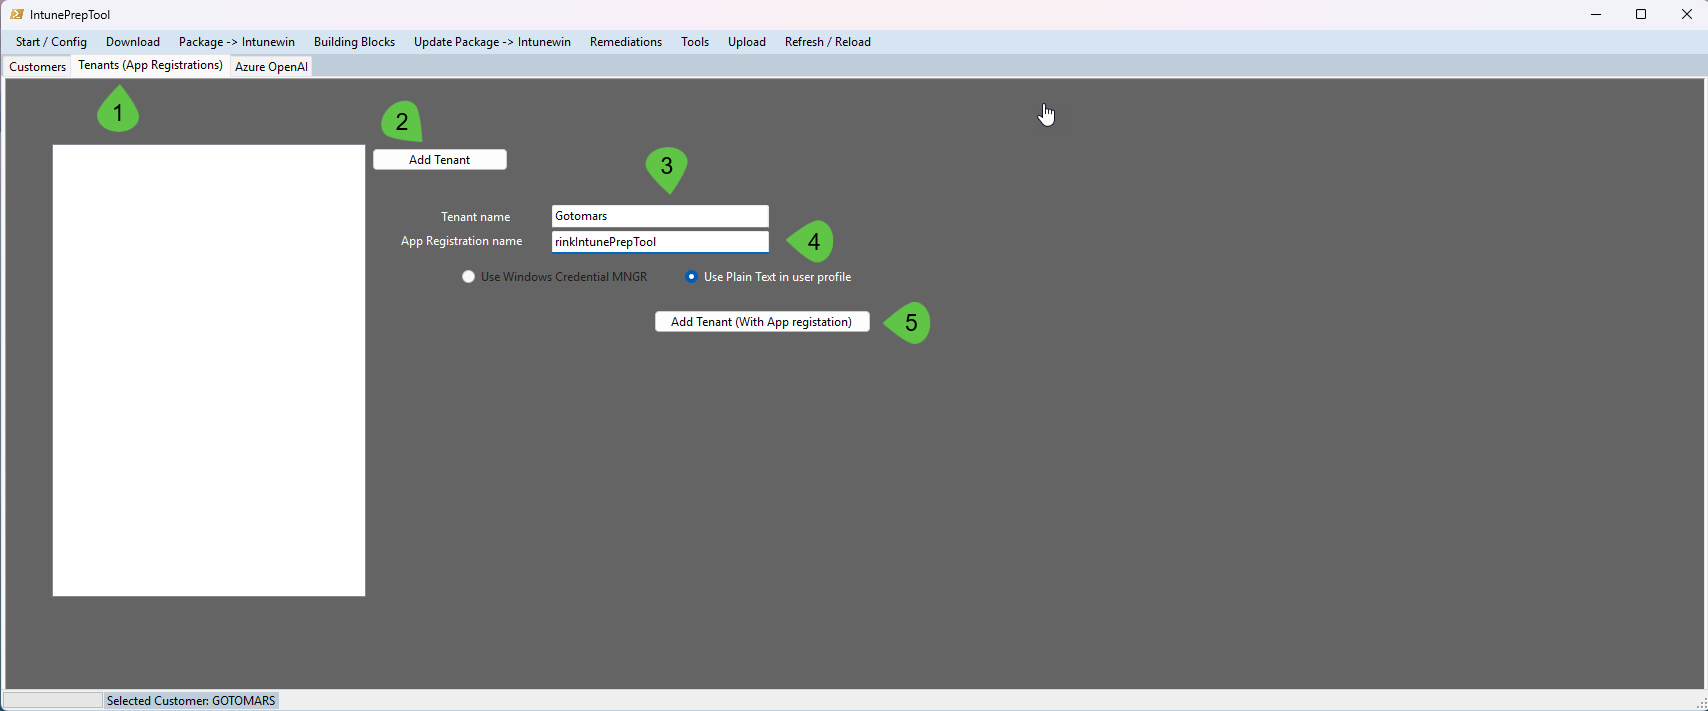
Go to the Tenant (App Registrations) tab.
- Click Add Tenant.
- Fill in the following fields (no spaces allowed):
- Tenant Name
- App Registration Name
- Click Add Tenant (With App Registration)
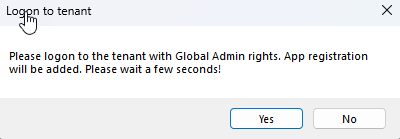
A message will appear:
“Please log in to the tenant with Global Admin rights. The app registration will be added. Please wait a few seconds!”Note: Global Admin rights are required to automatically grant consent for the necessary API permissions in Entra ID. Only the required permissions will be applied.
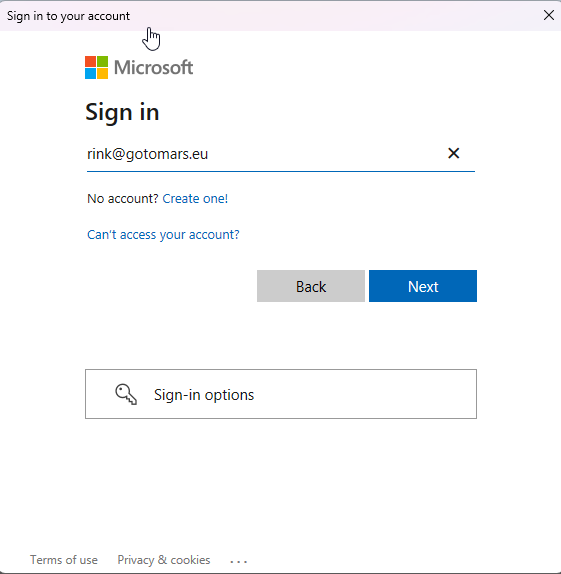
Within a few seconds to two minutes, a “Sign in to your Microsoft account” pop-up will appear.
Log in to your tenant.
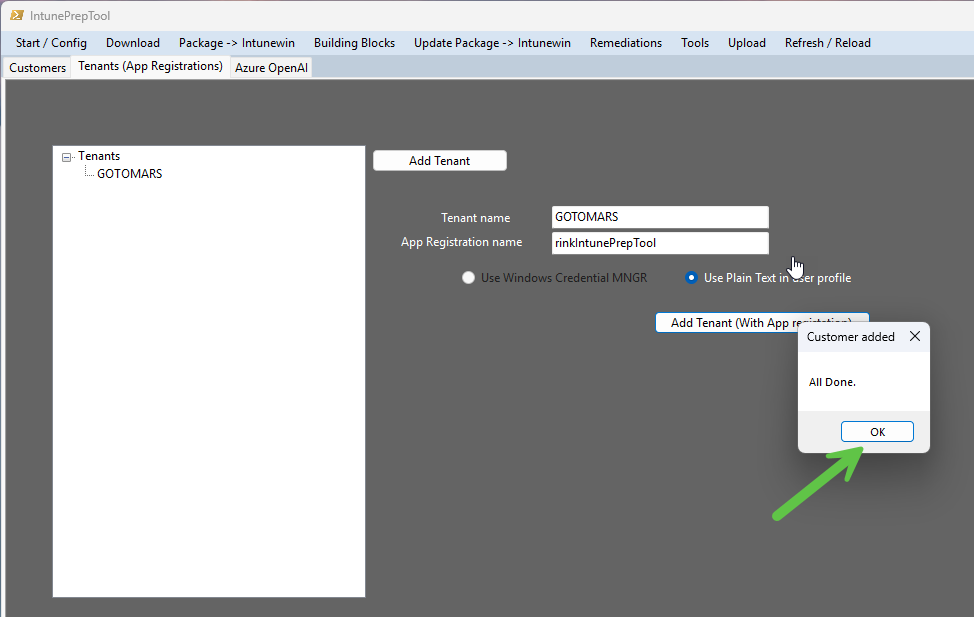
Click OK when the “All Done.” pop-up appears.
Setup Azure OpenAI (Optional)
- Go to the Azure OpenAI tab.
Click the Setup Info button to view a PDF file with setup instructions.