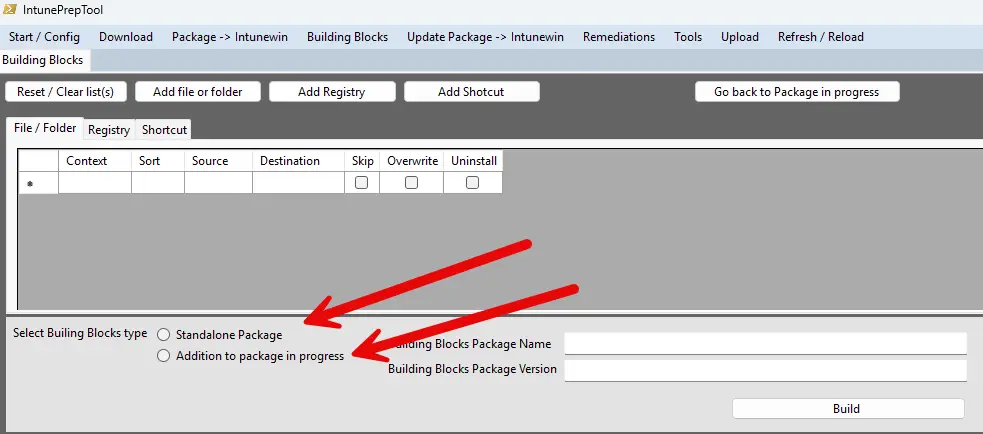
There are two types of Building Blocks:
- Standalone package
- Addition to package in Progress.
First time using IntunePrepTool? Click here for How To Basic Setup:
Basic Setup – IntunePrepTool.com
Using ‘Addition to Package in Progress’
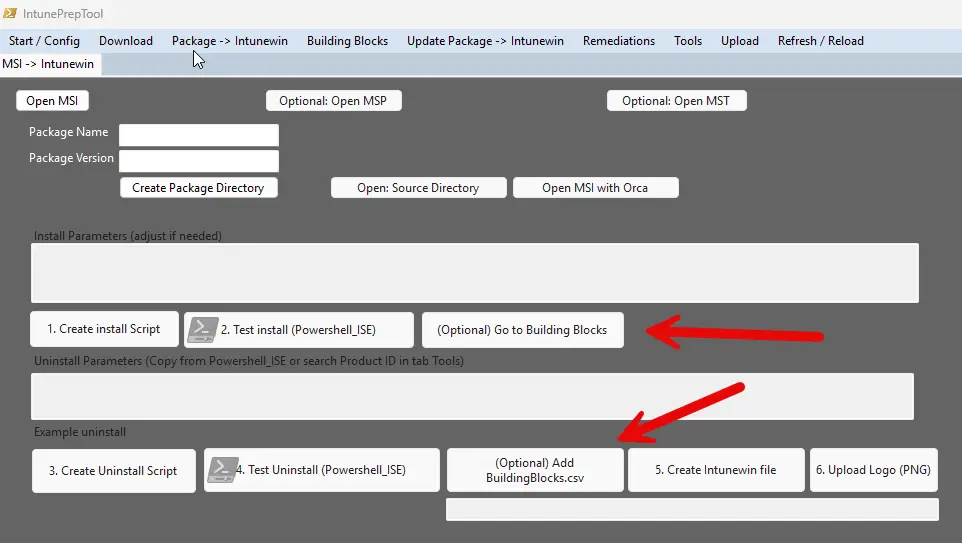
To begin, create a package from an MSI, EXE, MSIX, Chocolatey, or Winget installer. Once you’ve tested your install.ps1, click on (Optional) Go to Building Blocks.
On the Building Blocks page, the Package Name and Version fields will be automatically filled in. Use the Add file or folder, Add Registry, and/or Add Shortcut buttons to define your building blocks. When you’re done, click the Build button. This will generate a BuildingBlocks.csv file for you.
Next, click Go back to Package in Progress to return to your original package setup. After testing the uninstall, you can attach your BuildingBlocks.csv file by clicking on (Optional) Add BuildingBlocks.csv.
After this step, click Create Intunewin file to generate the final package. A new version of the BuildingBlocks.csv file will be saved.
When uploading, use this generated file. If needed, two Intunewin packages will be uploaded to Intune — one for the system context and one for the user context. Dependencies and automatic installation settings will be configured for you.
Using ‘Standalone Package’
Start by adding your desired Files or folders, Registry, or Shortcut actions.
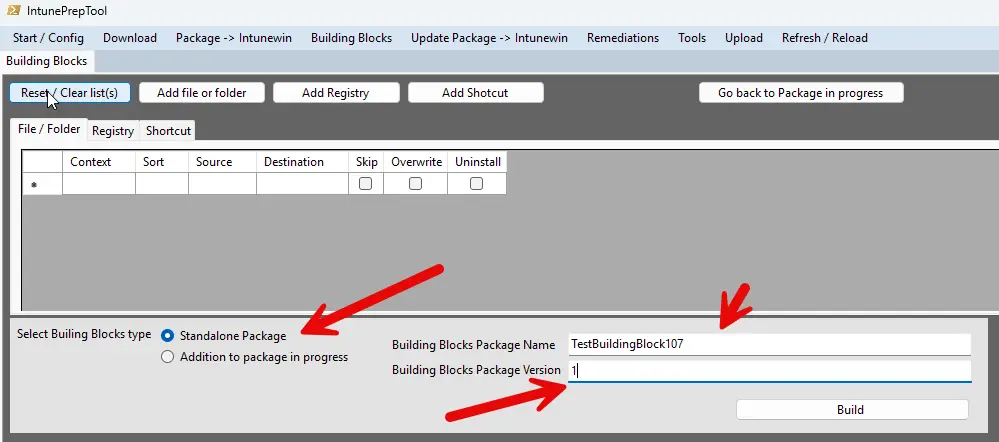
Once you’re done, select Standalone package, then fill in the Package Name and Version fields. Click Build to generate your Intunewin package(s). Depending on whether you’ve mixed system and user context actions, one or two Intunewin packages will be created for you.
Use the generated BuildingBlocks.csv file to upload your package(s) to Intune.
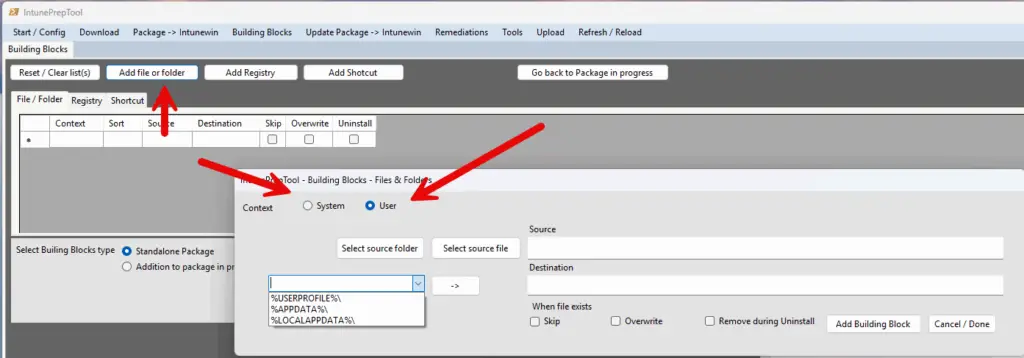
Add File or Folder
After clicking Add File or Folder, you must first choose between System or User Context.
The User Context allows you to add files or folders to the following locations:
%USERPROFILE%(e.g.,C:\Users\rink)%APPDATA%(e.g.,C:\Users\rink\AppData\Roaming)%LOCALAPPDATA%(e.g.,C:\Users\rink\AppData\Local)
For all other cases, use the System Context option.
After selecting the appropriate context, choose your source folder or source file and define the destination location. You can specify what should happen if the file already exists: Skip or Overwrite.
You can also choose whether the file or folder should be removed during uninstall.
Once you’re ready, click Add Building Block. You can repeat this process to add multiple actions if needed.
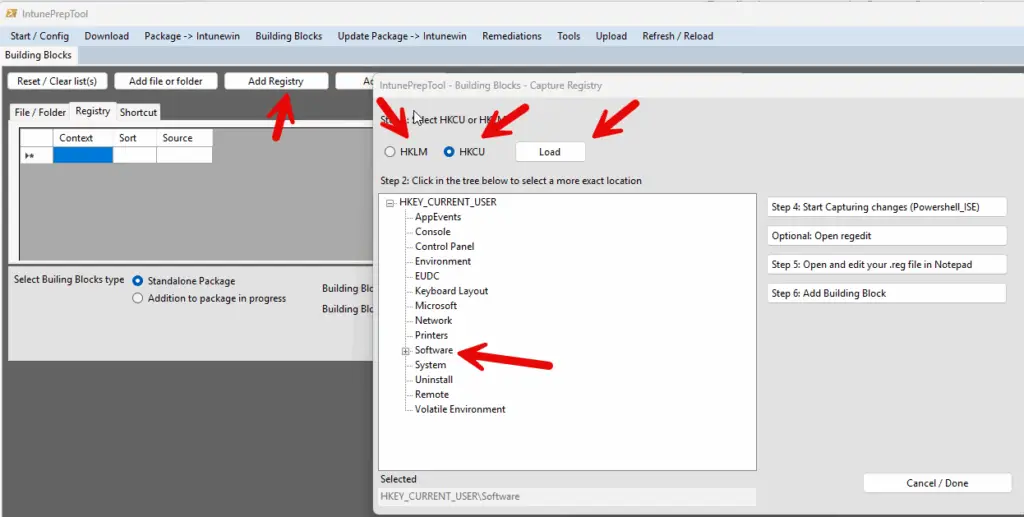
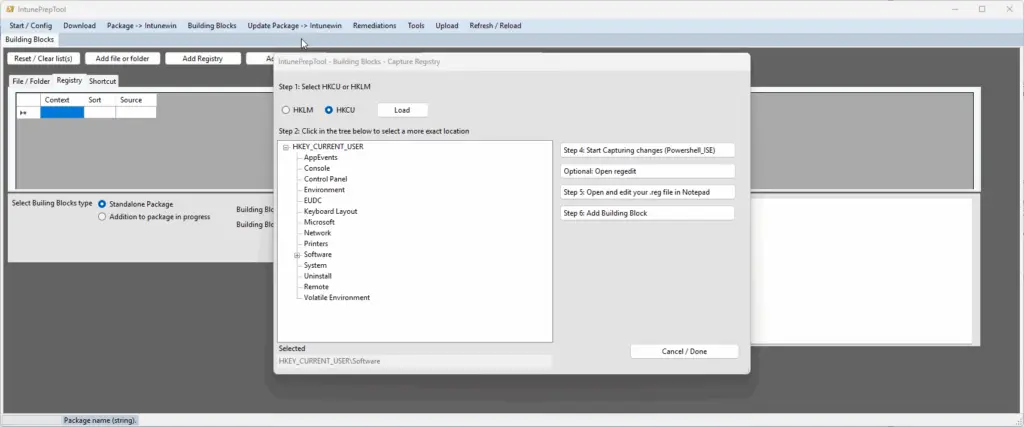
Add Registry (1/3)
After clicking Add Registry, start by selecting either HKLM or HKCU, then click Load.
Navigate through the tree structure (e.g., select Software) or specify a more detailed location if you know exactly which registry path you want to capture.
When you’re ready, click Start Capturing Changes (PowerShell ISE) to begin tracking your registry modifications.
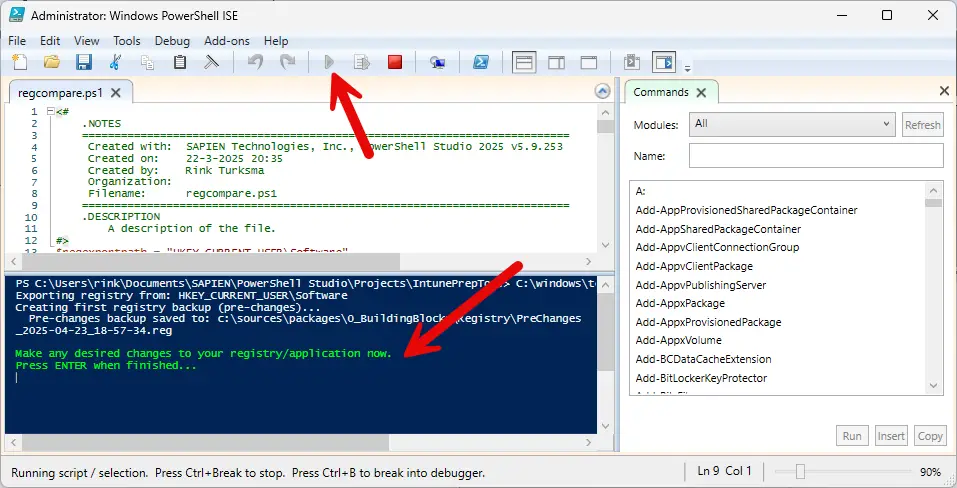
Add Registry (2/3)
In PowerShell ISE, click Run to start the script. Wait a few seconds until the following message appears:
“Make any desired changes to your registry/application now. Press ENTER when finished…”
At this point, you can either make changes within an application to capture the relevant registry settings, or click the (Optional) Open regedit button in the IntunePrepTool to manually edit the registry.
Once you’re finished, press Enter in PowerShell ISE.
If everything goes well, you will see a confirmation message in PowerShell ISE similar to:
- Differences found! Saved to: c:\sources\packages\0_BuildingBlocks\Registry\HKCU_extkjda
f_2025-04-23_18-57-34.reg - Removing the two backup files…
- All done. Please close this Powershell_ISE window and continue in the IntunePrepTool
Close Powershell ISE.
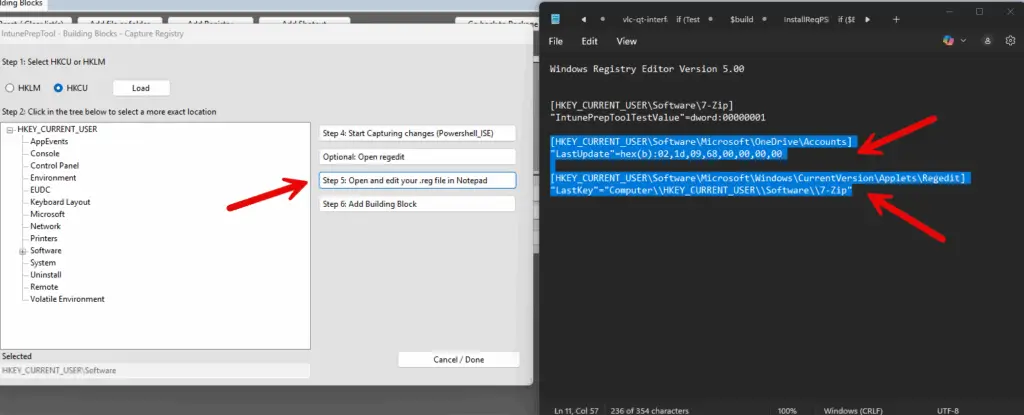
Add Registry (3/3)
Click the button Open and edit your .reg file in Notepad.
Review the file in Notepad, remove any unwanted registry actions, then save and close Notepad.
Finally, click the Add Building Block button to add the registry action to your Building Blocks table.
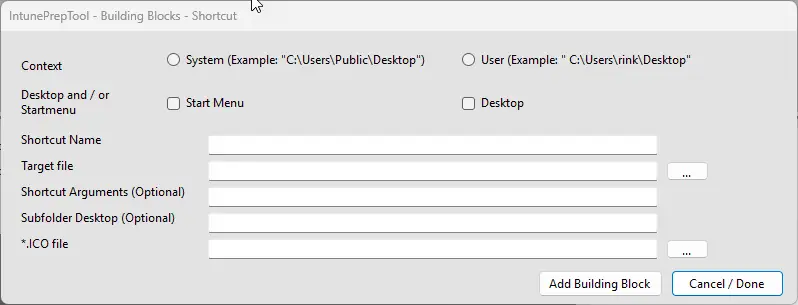
Add Shortcut
Start by selecting the System or User Context.
Next, choose where to place the shortcut: Start Menu, Desktop, or both.
Fill in the Shortcut Name, then select the target file and choose an .ico file for the shortcut icon. (this is required)
You can also specify an optional subfolder for desktop shortcuts and provide arguments if needed.
When you’re ready, click Add Building Block to save the shortcut action to your Building Blocks table.
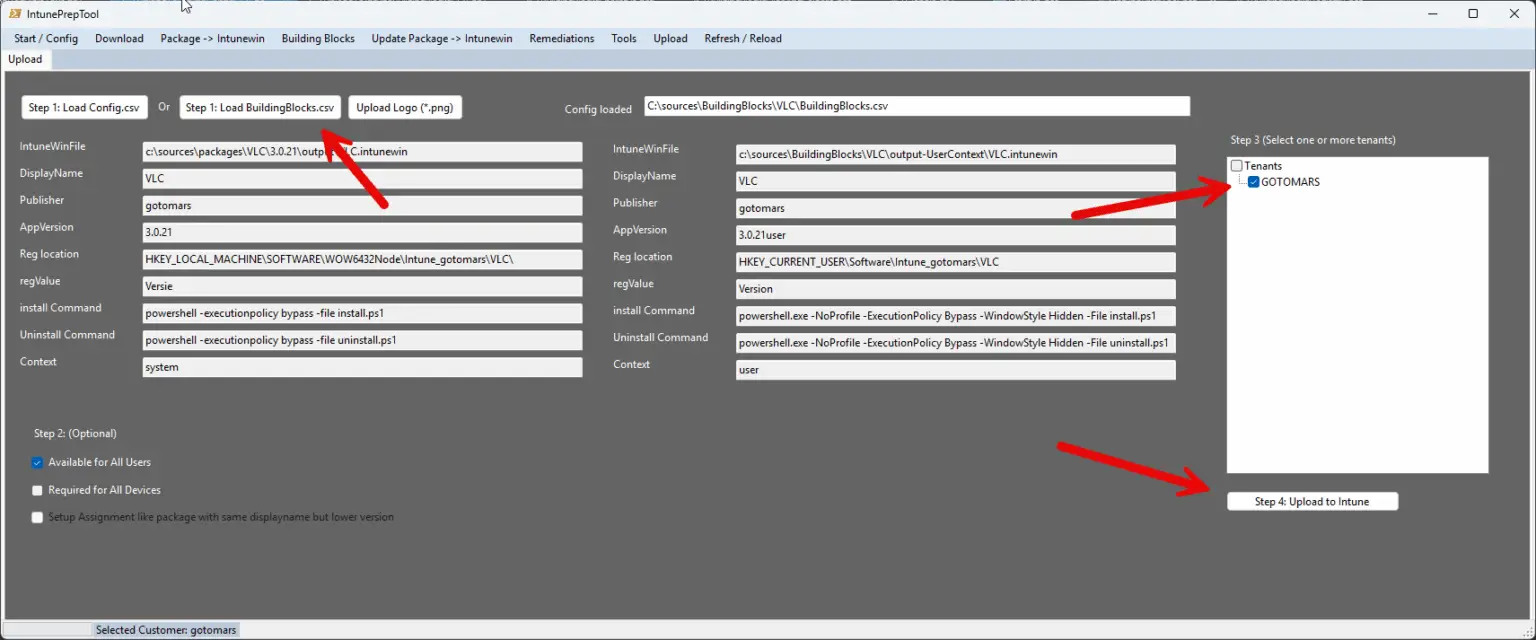
Uploading to Intune
Whether you’ve created a package in progress or a standalone package, always use the ‘Load BuildingBlocks.csv’ button to upload your configuration.
You can configure assignments in Intune after the upload is ready. When working with both a System context and a User context package, always apply the assignment to the User context app in Intune.
Alternatively, you can configure assignments using the IntunePrepTool by selecting the appropriate checkboxes in Step 2 to assign the app to all users or all devices.
In Step 3, select the correct tenant.
Finally, click Upload to Intune to complete the process.